
Help Center » Lesson 1: Sending Merits in bulk
Menu
Help Center » Lesson 1: Sending Merits in bulk
Step by Step Guide:
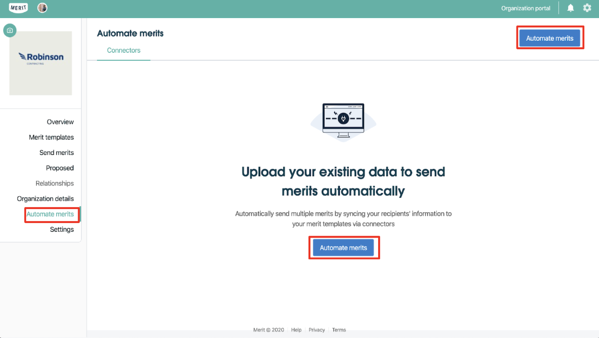
Step 1: Go to the Organization Portal and navigate to the Automate merits folder on the left. At the top or in the center of the page, click the Automate merits tab.
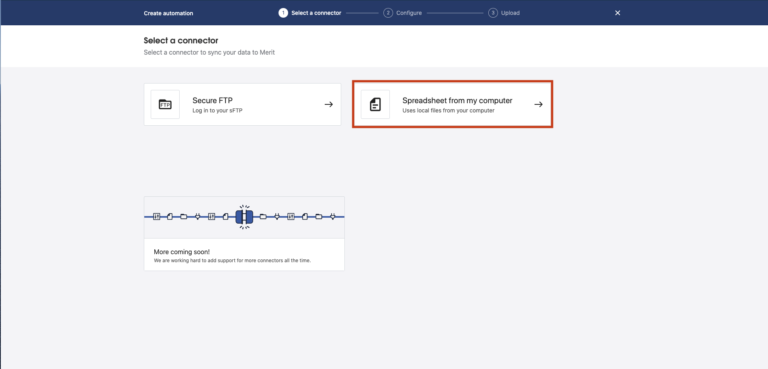
Step 2: Create a connector by selecting where you store your recipients’ information.
Click on Spreadsheet from my computer.
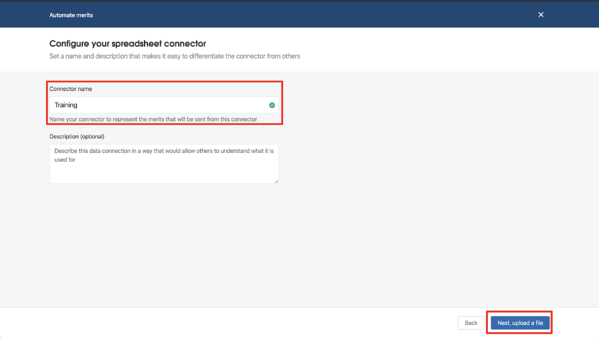
Step 3: Name your connector to represent the merits that will be sent from this connector.
Type the name in the Connector name box.
Click Next, upload a file.
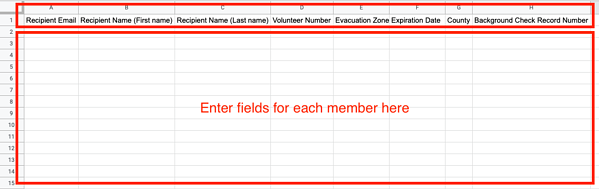
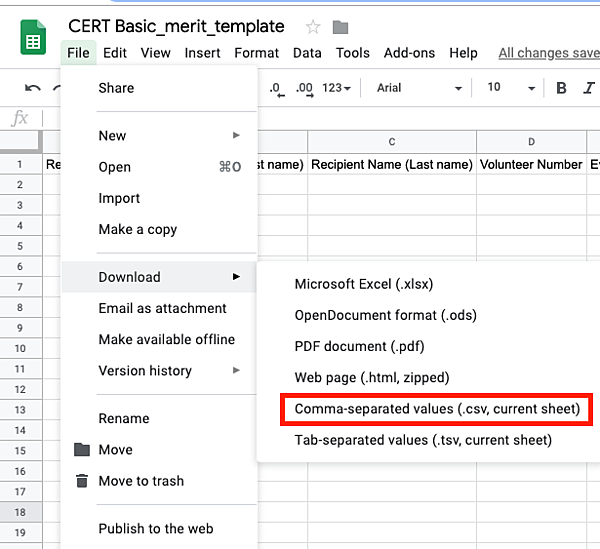
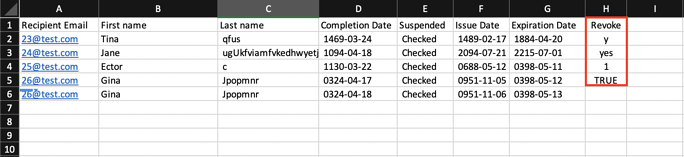
Create a .csv file that includes all of the fields associated with that merit template, as well as fields that need to be filled out. There must be fields for Email, First Name, and Last Name.
For any records that do not have an email address listed, a merit can be created that can be accessed in the Relationships section of your organization’s admin dashboard, but the merit will not be sent to anyone until the email address field is populated.
Note: This feature has to be switched on by a Merit representative
Please contact help@merits.com if you would like to use it for your organization’s merits.
Step 4: Fill in your .csv file with your member information. Do not delete the column headers or the .csv file may not import appropriately.
Note on date formatting
All date fields must be of the format YYYY-MM-DD. E.g. “2020-05-14” for May 14 2020. Formatting the date differently will cause a read error.
Drag or click to upload your spreadsheet.
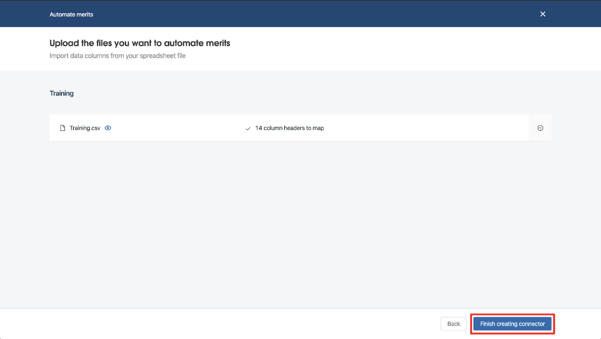
Import view:
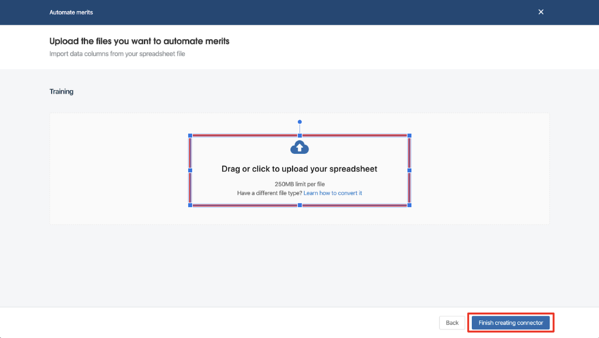
Click Finish creating connector.
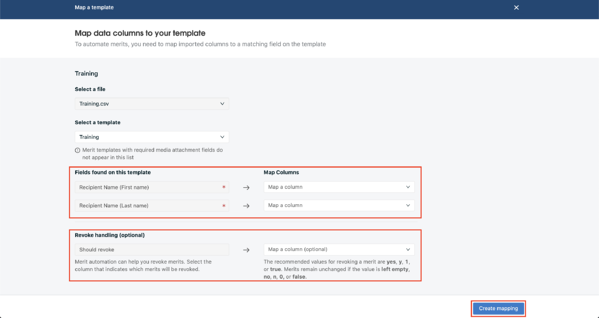
Step 6: Select the Map a template in the connector you just created.
Step 7: Merit then directs you to Select a template and map your column headers with the fields found on the merit template. Once the .csv file is successfully mapped, click Create mapping.
Step 8: The page will return to the Automate merits screen and a window will pop up that asks you to send merits. Click Send merits to complete the process or Cancel to go back.
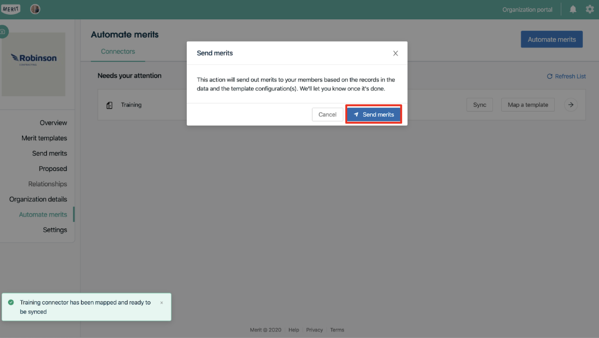
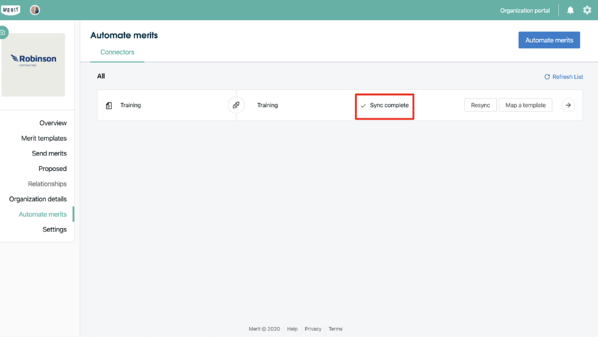
Step 9: The connector will now show the file as Syncing. The length of this process will depend on the size of your file.

Once this process is complete, the Syncing will change to Sync complete.
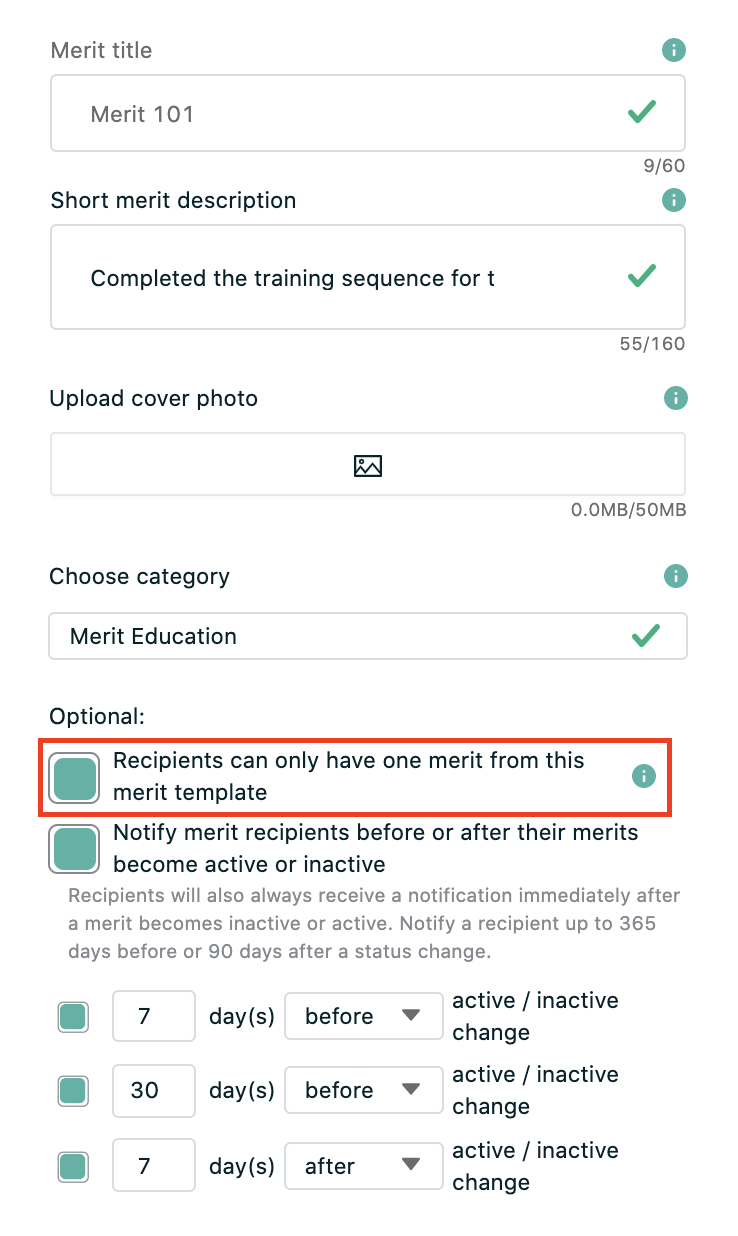
Step 10. Any merit within your spreadsheet can also be edited or revoked. Merit templates must have “Recipients can only have one merit from this merit template” selected in order for a sync to edit or revoke.
Editing Merits via csv: To edit multiple merits with your automation sync, change the values of the fields within your spreadsheet that you would like to edit and save. New fields cannot be introduced, and you cannot remove existing fields using this method.
Once the edit is complete, save your CSV file and sync or resync your merit connector.

Revoke – Revoke a merit by changing the value in a Revoke column of your CSV file.
The value in the revoke column must be any of the following: 1, y, yes, true.
Every other value (including blank) will not revoke the merit.
Once the revoke values are changed, save your CSV file and sync or resync your merit connector.